How Touchscreen Displays Improve Attendee Engagement at Events
Modern event attendees expect interactive experiences rather than passive presentations. Touchscreen displays provide a simple but powerful way to increase engagement, allowing participants to explore content, navigate information, and interact directly with digital materials.
From conference directories to product demonstrations, touchscreen kiosks help transform traditional events into interactive environments.
Why Interactive Technology Matters at Events
Attendees retain more information when they interact with content rather than simply viewing it.
Touchscreens encourage:
exploration self-guided learning product discovery lead capture
For event planners researching interactive display solutions
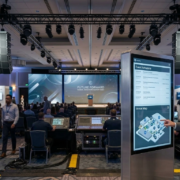
Common Uses for Touchscreen Displays
Digital Event Directories
Touchscreens help attendees locate sessions, meeting rooms, and exhibitors.
Product Demonstrations
Companies use touchscreens to display product catalogs, videos, and case studies.
Lead Generation
Interactive kiosks allow visitors to submit contact information or register for demos.
Designing Effective Touchscreen Content
Successful touchscreen interfaces should be:
simple to navigate visually clear responsive
optimized for large touch targets
Overly complex menus reduce engagement.
Conversion CTA
If you want to add interactive technology to your next event, explore touchscreen rental solutions available in major event markets: